How to Keep Turtle Tank Clean?
TheCritterCove is reader-supported. When you buy via links on our site, we may earn an affiliate commission at no cost to you. See more here.


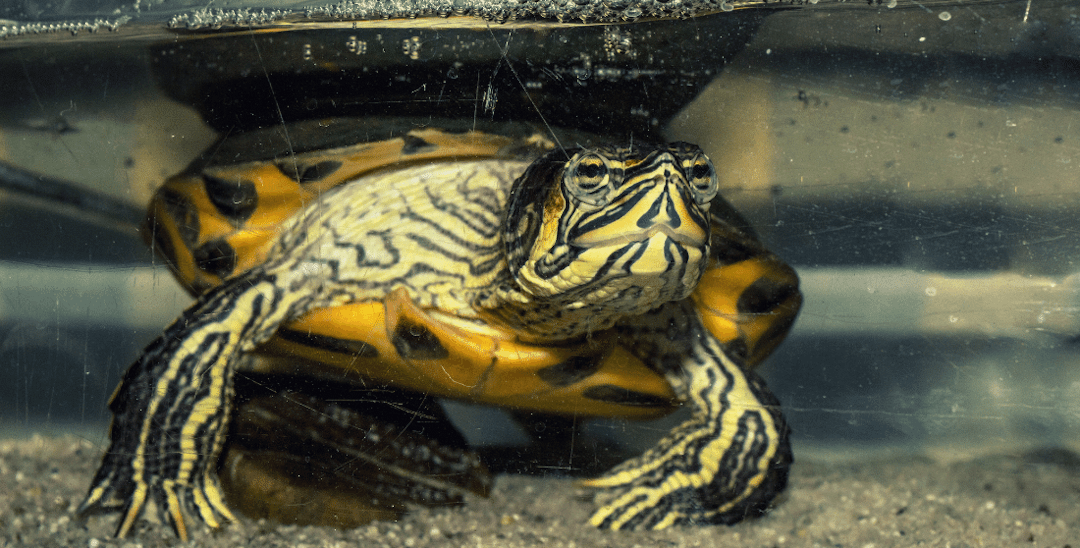
Having clean and clear water in your turtle tank is a thing of pride to all turtle owners, but attaining that feat is unknown for many.
Turtles are messy and tend to pollute the water frequently. They defecate, urinate, and swim in the water. They also drink and leave food debris in the water.
If left uncared for, the turtle tank will become foul-smelling and dirty, which is dangerous for both you and your pet.
So how then do you ensure your turtle tank remains clean? Well, there are some quite easy ways to solve this issue and we will discuss them in this article.
1. Use A Bigger Turtle Tank

The purpose of utilizing a big tank is that smaller tanks will get dirty more quickly. Turtles produce a lot of ammonia, which they eliminate through feces.
These residues would build up in large amounts in a little tank, posing a risk to your pet’s health. As a result, it is always preferable to utilize a big tank.
A rule that will guide you in your choice of the appropriate tank size is to go for a tank that can hold a minimum of 10 gallons of water for every inch of carapace length.
This is a great way to determine what tank size you will need for your turtle. That said the best tip that I can give you as a pet owner is to buy the largest tank that you can get your hands on, especially if you are starting with a small turtle.
They grow fast and big and no one wants a second or a third turtle tank laying around just because you bought a small enclosure at the start.
RELATED READ: The Best Turtle Tanks
2. Clean-Up Food Leftovers

Food leftovers will always be seen floating on the water and you should make it a daily routine to clean the debris up.
If left unattended, it will decay.
A small net is also a wonderful idea. It makes scooping out leftover food (if you feed in the tank) easier, as well as removing other debris and waste.
It’s best to not feed turtles in the same tank where they live. It’s better to feed your turtle outside of its aquarium in a bowl, plastic, or Rubbermaid container.
It not only aids in the maintenance of water quality, but it also allows you to see how much your turtle is eating and, in some cases, whether or not they are eating at all. It can also tell you if your turtle is pooping correctly since most of the time they will do so in this feeding dish.
This makes it easier to clean and keeps the tank cleaner, since food residue can cause germs, fungus, and ammonia levels to rise.
A turtle’s feeding container should be big enough for the animal to walk about in comfortably and the water depth should just reach the top of the shell.
To avoid personal health concerns, do not use this feeding container for preparing or storing meals or other objects intended for human consumption.
RELATED READ: How to Set Up a Turtle Tank
3. Create a Feeding Schedule for Turtle

The most common recommendation for keeping aquarium water clear is to only feed a turtle as much as it can eat.
Overfeeding is one of the most prevalent reasons for unclean water in a turtle tank.
This is a contentious issue among turtle owners. This ranges from one food stick per day to feed them as much as they will eat in a 30 minute time period every day.
We’ll only talk about what’s worked for us and what has done very well. Every day, we offer our hatchlings as much food as they can consume within 15-20 minutes.
Adults and sub-adults are fed twice weekly, with no limit on how much they can consume in the same amount of time.
Turtles produce far more waste in a single day than a fish does in a week, so choose something that will fit your tiny pets’ feeding schedule.
RELATED READ: How to Take Care of a Baby Turtle
4. Vacuum the Tank Frequently

This is an important task to perform especially if you have a substrate in your tank.
Vacuuming helps to change a portion of the water so as to maintain healthy chemical levels, and regulate the buildup of dirt.
A gravel vacuum is specially designed to remove debris from the substrate. It’s a vital part of your tank cleaning arsenal, using it is simple, just attach the vacuum to your hose and suck up the debris.
Be sure to do this with the water level quite low so you lessen the chances of sucking items or any other inhabitants in the tank.
Cleaning out your filter is equally important because it will give you a clear view of the water, making it easier to spot any potential problems.
RELATED READ: How to Clean a Turtle Tank
5. Monitor Chemical Levels

Turtles are more tolerant to changes in the chemical levels of water when compared with fish, but this doesn’t mean you shouldn’t monitor and try to keep it within the healthy range.
A more acidic pH is preferred since it aids in the prevention of bacterial and fungal infections.
The lower the pH, the less likely particular sorts of these awful intruders will be able to survive. The higher the pH, the more various sorts of nasty things can grow and thrive in the turtle’s environment.
There are a variety of test kits available, and they’re excellent for getting fast, simple, and accurate results on pH, ammonia, and nitrate/nitrite levels.
Some healthy chemical levels are:
- pH range of 6.0 and 8.0
- Absolutely zero chlorine
- Absolutely zero ammonia
- Nitrite of 0.5ppm and below
- A nitrate level of 40ppm and below
Visual representation of the nitrogen cycle in a turtle tank:

How to Cycle a Turtle Tank
Cycling a turtle tank involves introducing friendly bacteria that eat and breaks down ammonia and the resulting nitrite into the less harmful nitrate. This way your tank stays clean and safe for your turtle.
Good bacteria need your turtle’s waste to survive, while your turtle needs the bacteria to break down its waste for it to be able to survive.
This means both can stay together but as the cycling would take days to be complete, it’s better to have the bacteria active by other means before introducing your turtle to the tank.
- The slowest way which is also the simplest way to begin the nitrification cycle is to set up the tank completely and add a little amount of fish food or turtle food. You can also use household ammonia but with this, start with two drops for every two gallons of water you have. After introducing the ammonia, check in a few days for an indication of the presence of ammonia. Once you see a spike in ammonia, it’s an indication that the cycling process has begun. If you don’t see any sign of ammonia, add more food or ammonia and wait a few days more.
- Once the presence of ammonia has been established, check the chemical levels daily and add as much food as is needed to maintain the ammonia level at 3 to 5 ppm (parts per million). After a while, you will see a spike in the nitrate level of the water. This means that the Nitrosomonas bacteria have broken down the ammonia and is a sign that the cycle is proceeding well. Keep adding food or ammonia and continue checking the chemical levels daily to ensure the ammonia level remains within 3 to 5 ppm. At a point, the nitrite levels will go down and the nitrate levels go up. This means the Nitrobacter bacteria are converting nitrite into the less toxic nitrate.
- At this point, your tank cycling is almost complete and it’ll take a while for the cycling to be well established and for the chemical levels to be safe. It’s normal for the tank water to go cloudy at the initial cycling period so don’t worry about it.
You can speed up the cycling process in your turtle tank by introducing some bacteria from a healthy tank of similar conditions to yours, or by using a commercial bacteria supplement.
RELATED READ: The Best pH Meter for Aquariums
6. Change the Water Frequently

Water change helps to keep the tank clean and regulate the chemical levels of your tank.
The frequency of water change depends on the number of turtles you have, the size of your tank, the strength of your filter, amongst others.
When you vacuum your tank, you partially change the water and it also counts as a water change.
If you, however, allow the tank water to get cloudy, and smelly then you have waited too long and your tank water is long overdue for a change.
Every two to three weeks, a 20-30% water change is recommended. You can vacuum the gravel substrate during this period.
RELATED READ: How Often to Clean a Turtle Tank?
7. Aerate the Water

You might think this step is unnecessary because your pet has lungs and can breathe in air.
Aerating the water is beyond making your turtle comfortable in the water.
Bad bacteria that you would want to keep away are mostly anaerobic, and by aerating your turtle tank you discourage their growth.
Aeration is only required for water quality reasons since it expels CO2 from the water and raises the pH if you’re attempting to keep it at a high level. It also aids in the prevention of protein scum on the surface.
Turtles are not typically found in aerated water, and despite popular belief, turtles do not play or perform other activities in the bubbles.
If you have fish in your tank, and most importantly if the nitrification bacteria that break down waste are supplied with oxygen, it’s critical.
RELATED READ: What Do Turtles Like to Play With?
8. Keep the Water Moving

Moving the water around the tank is a good way to improve its quality. You can use a powerful filter or a circulation pump to keep the water moving.
Moving the water around allows various parts of the tank to be at even temperature and it improves the efficiency of filtration.
It also slows down the growth of algae and distributes bacteria and oxygen throughout the tank.
9. Introduce Plants

Did you know that plants contribute to water purification as well? Plants that live in and on the water absorb carbon dioxide and emit oxygen, just like those that dwell in the air.
This is beneficial to turtles and fish in aquatic systems, enhancing water quality. Plants capture nutrients, germs, metals, and other pollutants from the water.
Plant-based water filtering is getting a lot of press recently as a non-chemical way to clean water.
Common Aquarium-Safe Plants:
- Frogbit
- Hornwort
- Amazon Sword
- Anachris
- Moneywort
- Red Ludwigia
- Red Tiger Lotus
- Duckweed
- Java Fern
- Java Moss
Just be careful that some plants may be toxic for your turtle if he’s ever interested to take a bite out of it.
RELATED READ: The Best Live Plants for Turtle Tanks
10. Introduce Fish

Fortunately, cleaning your tank does not have to be a solo job. If you are clever about it, you may enlist the aid of the tank’s inhabitants as well.
Some fish help with maintaining good tank conditions by eating algae and eating up leftovers.
How to Stop Algae in Turtle Tank?
The presence of algae is very common in turtle tanks because of the waste that turtles produce. These wastes are nutritious to algae and promote their growth.
This particularly applies to removing the algae from your turtle tank.
Algae are a natural part of any turtle tank and they can produce oxygen for your turtle and help control nitrogen levels in your aquarium. However, if left unattended, the algae can grow at a rapid pace and take over your turtle tank.
In the end, your aquarium will be completely covered in algae. The most common approach to combat algae growth and keep your aquarium clean is to add fish that eat algae as food.
Here’s a list of the best algae eaters in the fish community:
- Bristlenose Pleco
- Mollies
- Crossocheilus oblongus
- Gyrinocheilus aymonieri
- Twig Catfish
- Otocinclus Catfish
Just as with plants, careful consideration should be made before adding any fish to be sure that both pets can live together.
RELATED READ: Can You Have Turtles And Fish In The Same Tank?
11. Use a Good Filter

If you can afford a filter, then it would be a good addition to the tank as it helps in keeping the dirt away, regulating chemical levels, and keeping the water clear. Tank filters constantly work to maintain the purity of the water.
A decent filter needs some mechanical filtering, enough space for biological filtration to execute the nitrogen cycle, and a lot of flow rate. The more flow you have in your filter, the cleaner your water will stay.
Now you may be asking, what’s the finest turtle filter? That answer is going to depend on the size of your tank, the type of filter you’re using, and how often you replace your filter media.
So, as you can see, there’s no simple answer to the question. A good rule of thumb is to get a filter rated for at least two times the size of your tank.
So, if you have a 55-gallon tank, get a filter that’s rated for at least 110 gallons.
There is no such thing as too much filtration when it comes to water filters. You can’t go overboard because turtles produce significantly more waste in one day than a fish does throughout an entire week, so don’t worry about it.
Cleaning out your filter is equally important because it will give you a clear view of the water, making it easier to spot any dirt or debris.
It is also important to maintain your filter on a regular basis if you want it to function at its best.
RELATED READ: The Best Filter for Red Eared Slider
12. Dechlorinated Water Changes

Make sure to use dechlorinated water when you do water changes. Chlorine is bad for your turtle and it would kill your tank’s good bacteria.
Something very important to remember before adding any form of bacteria to aid in the breakdown of ammonia.
Many people bathe in and drink water that contains chlorine, which kills the bacteria. Most of us use the same water to fill and enhance our turtles’ homes.
This chlorine will destroy the germs as soon as you put it in. In the event that an established bacteria base has already developed in an existing aquarium, chlorinated water will suffocate or severely damage these bugs.
So, how can you avoid this? It is advised that you mix Biozyme before adding substrate when establishing a new tank. Once you’re ready to add the water, use a dechlorinating product to prevent any harm.
Biozyme is a great additive to your turtles’ home that eats ammonia.
Before adding it to your aquarium, allow the water to set for approximately 2 minutes after it has been treated.
It’s a lot easier in established tanks. Water will evaporate, but you can’t stop that; however, treating small amounts of water at a time and safeguarding your helpful bacteria by adding one of the several chemicals that remove chlorine is an option.
RELATED READ: African Sideneck Turtle Care
13. Use UV Sterilizers

Not as necessary as the other points covered but it can be a good pathogen killer for the water, it is also a good way to keep the water clear.
UV sterilizers would keep your tank clean with the use of UV light to kill bacteria, viruses, fungi, and algae including other forms of parasites that may be in the water.
RELATED READ: The Best pH Meter for Aquariums
Why Is My Turtle Tank So Cloudy?
With a new tank, the water gets cloudy because there are not enough beneficial bacteria to consume the waste your turtle is producing.
This will clear up after some time once the bacteria flourish and are enough to consume all the waste.
If the tank isn’t new but gets cloudy after a while, it could be a pointer to any of the following problems;
- Your filter may not be powerful enough, not clean, or not working properly.
- If it’s not from your filter, then the problem could be that you are changing the tank water too often. Doing this wipes away the beneficial bacteria that are supposed to break down ammonia and nitrites that build up due to your pet’s waste. So the water gets cloudy as the wastes accumulate but if you allow the bacteria to flourish, it will clear up.
- You may also be overfeeding your turtle or you could have too many turtles for the size of your tank.
RELATED READ: The Best UVB Light for Turtles
How to Make A Turtle Tank Smell Better
Turtle tanks can start to smell if they are not properly taken care of.
The smell of your tank is in proportion to the number of pets you have and the size of your tank, so regular cleaning is key to an odor-free tank.
Steps that you can take to ensure an odorless turtle tank include:
| Remove Uneaten Food Regularly | With a skimmer net, remove any leftover food on the tank surface at the end of each day. Not only will this help reduce bad odor, but it will also help keep your tank clean. Leftover foods can clog the filter, and can also decay causing the tank to smell. |
| Remove Shell Skin and Other Floating Matter | Turtles shed skin regularly like other reptiles, but they do not shed in an entire piece. If this skin is left to float, it could end up clogging the filter. Floating feces too are a bad sight and will contribute to making your tank smell. So always watch for floating matter and remove them immediately. A few days after you clean your tank and there is a white, flaky residue on the bottom of the tank or on top of your substrate, don’t worry. This is most likely calcium residue from your pet’s shell and it’s normal. However, if the residue accumulates and looks like algae, then you need to do a more thorough cleaning. If you notice your turtle tank water turn red, don’t panic. This is normal and the result of a chemical reaction between the chlorine in your tank water and your pet’s waste. It might not be appealing, but it is harmless. |
| Maintain Optimum Temperature | Ensure that the temperature of your turtle tank is right as this will not only keep your pet healthy but will also help in controlling odor. High temperatures contribute to shell rot and also encourage the growth of algae which can cause your tank to smell. |
| Have a Tank Cleaning Schedule | Do a partial water change weekly, and do a complete cleaning two to three times a month. This will take out dirt and turtle waste, and prevent bad smells. |
Conclusion
Keeping your turtle tank clean isn’t a walk in the park and if not done right, could cause discomfort.
With the information in this article, you can now provide better care for your pet as you ensure its tank is truly comfortable for its dwelling.
The challenges you are likely to face and the reasons for them have been treated here so now you are better equipped to deal with whatever lies ahead to ensure your pet stays healthy.
Last updated on March 4th, 2022.